Category: React
React
React is a front end web framework built entirely out of JS. We use JSX, an extension of vanilla JS, to write our components.
Why React?
Using components allow us to separate functionality and code.
It has a virtual DOM, to render faster.
React includes Babel that compiles JSX down to React.createElement() calls and Webpack, the module that bundles the JS files of the project.
Easy to create a new react app and run npm install and npm start.
Components
Conceptually, components are like JavaScript functions. They accept arbitrary inputs (called “props”) and return React elements describing what should appear on the screen. –reactjs.org
*React elements are the objects created by React.createElement()
|
1 2 3 4 5 6 7 8 9 10 11 12 13 |
//These two examples are identical const element = ( <h1 className="greeting"> Hello, world! </h1> ); const element = React.createElement( 'h1', {className: 'greeting'}, 'Hello, world!' ); |
Types of components
|
1 2 3 4 5 6 7 8 9 10 11 12 13 14 15 16 17 18 19 20 21 22 23 24 25 26 27 28 29 30 31 32 33 |
//App.js //Functional component import React from 'react'; const App = props => { return ( <h1>Hello, {props.name}</h1>; ) } export default App; //Class component import React from 'react'; class App extends React.Component { render () { return <h1>Hello, {this.props.name}</h1>; } } export default App //Pure Component import React, { PureComponent } from 'react'; class App extends PureComponent { render() { return <div></div> } } export default App; |
- If props and state are not changing and we don’t need special work updating our component we can use
PureComponent. - If we don’t need to use state and lifecycle methods we can use a functional component. In order to use state we have to inherit from Component, and functional components don’t do that.
Functional components don’t have state but have props, we have to explicitly pass them as the argument for the function.
We can use object destructuring and extract values from props.
|
1 2 3 4 5 |
import React from 'react'; const App = ({ name }) => <h1>Hello, { name }</h1> export default App; |
The components are the files written using JSX. You can import one file/component into another component and make it its parent component so its parent can render it inside an element.
Components:
*Always start component names with a capital letter.
*must never modify its own props. For that, use the state.
All React components must act like pure functions with respect to their props. –reactjs
*I would start writing the component as a function component and if class component features, like .state, are necessary, then change it to a class component.
Container and presentation components
So we have talked so far about functional, class and pure components. Container and presentational components are not different types of components, they are a way to organise your react app.
Presentational components usually receive props and display content.
Containers keep more complex logic, dealing with state and usually are class components.
Render a component
In this example I render the App component.
|
1 2 3 4 5 6 |
//index.js ReactDOM.render( <App />, document.getElementById('root') ); |
Importing from the node_modules folder and the src folder, exporting and the Component Chain
|
1 2 3 4 5 6 7 8 9 10 11 12 |
//Importing from the node_modules folder import React, { Component } from 'react'; //Importing components you have created in your app, in the src folder. import App from './App'; //The file that is importing this component now can use it as <App /> in the render() method. //Here your code for your component //This allows other files to import it export default NameOfThisComponent |
When a component doesn’t have an export means that is the top of this chain.
*For an optimization of udpating, React recommends using React.PureComponent instead of React.Component. PureComponent doesn’t have access to shouldComponentUpdate because he will check for changes in props and state and update if necessary.
|
1 2 3 4 5 6 7 |
import React, { PureComponent } from 'react'; class App extends PureComponent { } export default App; |
Props are arguments passed into React components. They are like function arguments in JS and attributes in HTML. To send the props into a component, we use the same syntax as HTML attributes. React props are read-only. A component can change its own state but not its props. The parent who is passing the props can change them.
|
1 2 3 4 5 6 7 8 9 10 11 12 13 14 15 16 17 18 19 |
class Fruit extends React.Component { render() { return <h2>We have {this.props.fruit.quantity} {this.props.fruit.name} left!</h2>; } } class Supermarket extends React.Component { render() { const fruitInfo = {name: "apple", quantity: "1"}; return ( <div> <h1>Our products</h1> <Fruit fruit={fruitInfo} /> </div> ) } } ReactDOM.render(<Supermarket />, document.getElementById('root')); |
Default values for props:
|
1 2 3 4 5 6 7 8 9 10 11 12 13 14 |
class Fruit extends React.Component { render() { return <h2>We have {this.props.fruit.quantity} {this.props.fruit.name} left!</h2>; } } Fruit.defaultProps = { fruitInfo: { name: "defaultFruit", quantity: 0 } } //I am not sure about this example. |
State is similar to props, but it is private and fully controlled by the component. React components has a built-in state object. The state object is where you store property values that belongs to the component. When the state object changes, the component re-renders.
The state object is initialised in the constructor method.
We should call super() in the constructor since we are inheriting from another class via the extends keyword. We set initial state in the constructor because it runs first.
|
1 2 3 4 5 6 7 8 9 10 11 12 13 14 15 16 17 |
class Fruit extends React.Component { constructor(props) { super(props); this.state = { name: "apple", quantity: 1 }; } render() { return ( <div> <h2>We have {this.state.quantity} {this.state.name} left</h2> </div>; ); } } |
We can change the state using setState(), which will re-render the component:
|
1 2 3 4 5 6 7 8 9 10 11 12 13 14 15 16 17 18 19 20 21 22 23 24 25 26 27 28 29 |
class Fruit extends React.Component { constructor(props) { super(props); //Define the initial state this.state = { name: "apple", quantity: 1 }; } //this is an instance property. We use arrow function to bind the value of this to be our instance of Fruit changeQuantity = () => { this.setState({ quantity: 2 }); } render() { return ( <div> <h2>We have {this.state.quantity} {this.state.name} left</h2> <button type="button" onClick={this.changeQuantity} >Change quantity</button> </div>; ); } } |
When we want to update our state based in the previous state. Never use a this.state inside a setState. We can pass a function to setState that, when called inside setState will be passed the component state from when that setState was called (previous state) and the return value will be the new state (important use return!).
|
1 2 3 4 5 6 7 8 9 10 11 12 13 14 15 16 17 18 19 20 21 22 23 24 25 26 27 |
class App extends Component { constructor() { super() this.state = { count: 0 } } handleClick = () => { this.setState(previousState => { return { count: previousState.count + 1 } }) } render() { return ( <div> <h1>{this.state.count}</h1> <button onClick={this.handleClick}>Click me! </button> </div> ) } } |
React’s Event System
React uses basic HTML events and wrap them in the SyntheticEvent to make sure events are handled the same way across all browsers.
setState() sets state asynchronously.
|
1 2 3 4 5 6 7 8 9 10 11 12 13 14 15 16 17 18 19 20 21 22 23 24 25 26 27 28 29 30 31 32 33 34 35 |
class App extends Component { constructor() { super() this.state = { count: 0 } } //We first create the event increment = (event) => { console.log(event.type); //prints click console.log(`before setState: ${this.state.count}`) this.setState({ count: this.state.count + 1 }) console.log(`after setState: ${this.state.count}`) } render() { return ( {/* We add an event handler to a JSX tag */} <div onClick={this.increment}> {this.state.count} </div> ) } } => before setState 0 => after setState 0 => before setState 1 => after setState 1 |
|
1 2 3 4 5 6 7 8 9 10 11 12 13 14 15 16 17 |
//Remember, setting state is not synchronous! handleClick = () => { this.setState({ admin: true }) console.log(this.state.admin); //prints false }; //If I want an updated state I can add a cb function to the setSate as a second argument //The callback will fire once the state has been updated handleClick = () => { this.setState({ admin: true }, () => console.log(this.state.admin)) //prints true }; |
|
1 2 3 4 5 6 7 8 9 10 11 12 13 14 15 16 17 18 19 20 21 22 23 24 25 26 27 28 29 30 31 |
//Another example with anything hardcoded in the setState import React from 'react'; class App extends React.Component { constructor() { super(); this.state = { admin: false }; } handleClick = () => { this.setState(previousState => { return { admin: !previousState.admin } }); } render() { return ( <div> <button onClick={this.handleClick}>{this.state.admin ? "ON" : "OFF"}</button> </div> ); } } export default App; |
Update a nested state
|
1 2 3 4 5 6 7 8 9 10 11 12 13 14 15 |
{ name: "Diana", address: { street: null, number: null }, } //Using the spread operator this.setState({ address: { ...this.state.address, street: "Sesame" } }); |
We can not modify props only the state. Every component can modify its own state using setState, but what if a child want to modify the state of its parent? In order to do this we can use a callback. The parent component can pass down a callback function to its child where its state is modified. The child will have access to the cb inside the props being passed to it.
Event pooling
When the event fires, the event data is sent to the callback. If we need to use this data in an asynchronous way we can store it in a variable or we can make the event persistent (event.persist()).
Forms
When you have a form in React you usually want to write a JS function to handle the submission and have access to the form data. There are two different ways to control the form’s data, the controlled and the uncontrolled form, but the safest is using a controlled form.
How to know if the component is controlled or uncontrolled? If the input has a value, it is a controlled component and if the input has a defaultValue is an uncontrolled component.
Controlled forms store their input values in the state. With a controlled component we can control user input and show errors. How do we add the input data to our state?
- Adding a value attribute to our input like <input
type="text" name="query" onChange="{this.handleChange} value="{this.state.query}"/>or for radio and checkbox types, the checked attribute:
123456<span class="token tag"><span class="token punctuation"><</span>input<span class="gatsby-highlight-code-line"> <span class="token attr-name">name</span><span class="token attr-value"><span class="token punctuation">=</span><span class="token punctuation">"admin</span><span class="token punctuation">"</span></span></span> <span class="token attr-name">type</span><span class="token attr-value"><span class="token punctuation">=</span><span class="token punctuation">"</span>checkbox<span class="token punctuation">"</span></span><span class="token attr-name">checked</span><span class="token script language-javascript"><span class="token script-punctuation punctuation">=</span><span class="token punctuation">{</span><span class="token keyword">this</span><span class="token punctuation">.</span>state<span class="token punctuation">.admin</span><span class="token punctuation">}</span></span><span class="token attr-name">onChange</span><span class="token script language-javascript"><span class="token script-punctuation punctuation">=</span><span class="token punctuation">{</span><span class="token keyword">this</span><span class="token punctuation">.</span>handleChange<span class="token punctuation">}</span></span><span class="token punctuation">/></span></span> - and then updating our state with the setState method inside an onChange event listener that will fire every time the value of the input changes.
|
1 2 3 4 5 6 |
handleChange = event => { this.setState({ //or event.target.checked query: event.target.value }); }; |
Having the form data in our state means that it is easy to pass them down as props to other component or pass them to a parent component using a function callback supplied in props.
|
1 2 3 4 5 6 7 8 9 10 11 12 13 14 15 16 17 18 19 20 21 22 23 24 25 26 27 28 29 30 31 32 33 34 35 36 37 38 39 40 41 42 |
import React from 'react'; import { fetchBooks } from '..actions/searchForm'; class SearchForm extends React.Component { state = { query: '' }; handleChange = event => { this.setState({ query: event.target.value }); }; handleSubmit = event => { event.preventDefault(); this.props.fetchBooks(this.state.query); }; render () { return ( <div> <form onSubmit={this.handleSubmit} className="searchForm"> <label>Search:</label> <input type="text" name="query" onChange="{this.handleChange} value="{this.state.query}" /> <input type="submit" value="Search" /> </form> </div> ); }; }; export default SearchForm; |
Form with multiple inputs
We can access the event.target attributes of our handleChange function and get different info. For example if we give to our input an attribute name we can access it via event.target.nameand that means that we can create a more abstract handleChange function and use it without having to write a different function to handle the changes for each input of our form, in case we have a form with more than one input like the one in the example. In order to do so we have to make sure that the name value is equal to the key/keys of our state.
|
1 2 3 4 5 |
handleChange = () => { this.setState({ [event.target.name]: event.target.value }) } |
Lists
How to render a list of elements:
|
1 2 3 4 5 6 7 8 9 |
const colours = ["red", "blue", "yellow"]; const listColours = colours.map((colour) => <li key={colour}>{colour}</li> ); ReactDOM.render( <ul>{listItems}</ul>, document.getElementById('root') ); |
We should include a key (string) in our list of elements.
A good rule of thumb is that elements inside the
map()call need keys. reactjs.org
- render()
- Error handling during rendering, in a lifecycle method, constructor of any child component:
- static getDerivedStateFromError()
- componentDidCatch()
- Other APIs:
- setState()
- forceUpdate()
- Class properties:
- defaultProps
- displayName
- Instance properties:
- props
- state
The render() method is necessary for a class component to be valid, the other ones are optional.
React component lifecycle
Component lifecycle: creation(mounting), updating, and deletion(unmointing).
React has special built-in events relating to the component lifecycle, the lifecycle hooks/methods.
- Pre-mounting:
constructor(). Where we create the initial state of the component.
- Mounting:
static getDerivedStateFromProps(props, state). I gives us access to state and props.render(). It returns JSX so React can insert it into the DOM.componentDidMount(). Where we set up long-running or asynchronous processes such as fetching or updating data.
- Updating:
static getDerivedStateFromProps(props, state). Where we can check state changes prior to an update. Use it when you want to modify the state based in the new props.shouldComponentUpdate(nextProps, nextState). Invoked before the re-render. We can compare here if there are changes in the props or the state and avoid an unnecessary re-rendering.render().Here the next props and the state became available asthis.propsandthis.state. the component gets rendered into React’s virtual DOM.getSnapshotBeforeUpdate(prevProps, prevState). Just before React commits content from its virtual DOM to the actual DOMReturns a snapshot that can be used in the next hook. You can get info like the scroll position.componentDidUpdate(prevProps, prevState, snapshot). We can take some actions here without triggering a re-render of the component, like focusing on a specific form input. Here we have access to the previous and the current props and state and we can use this hook to update any third party libraries if they need to update due to the re-render.
- Unmounting:
-
- componentWillUnmount(). To clear any stuff we set up in
componentDidMount.And avoid automatic data fetching for example that we don’t want.
- componentWillUnmount(). To clear any stuff we set up in
-
Sending fetch requests
We can send a fetch request when the component is mounted, in the componentDidMount hook or we can tie it into an event.
|
1 2 3 4 5 6 7 8 9 |
componentDidMount() { fetch(url) .then(response => response.json()) .then(data => { this.setState({ colours: data.colours }) }) } |
|
1 2 3 4 5 6 7 8 9 |
handleClick = event => { fetch(url) .then(response => response.json()) .then(data => { this.setState({ colours: data.colours }) }) } |
Another way to organise the fetched data is using the container component pattern. Here it is a good link about it.
React Router
React router uses client-side routing, not server-side routing.
With Client-Side routing, it is now the responsibility of the Client-Side-Code to handle the routing, fetching and displaying of the data in the browser instead of the server.
Using pushState(state, title, url).
React and Babel
Babel is a compiler that makes all JS versions, even JSX, and emit a common one.
React and Webpack
Webpack combines different JS files, pre-bundles them together into a single file, to make less http requests to the server.
Reconciliation
React create during the first render the current tree, that looks like the current DOM, and when updates cause a re-render it creates the workInProgress tree, representing how the DOM will look. React uses a diffing algorithm to check for differences and if necessary uses this second tree to update the current tree and the DOM .
Boocket
Boocket is an app for book lovers that want to keep track of the books they want to read. You can search for books in the Google Book database and add them to your personal wishlist. If you can find anything you like you can create a new book and add it to your personal list and delete it when wished. All books are persisted in the Boocket database, so you will have always your list with you!
I used the create-react-app generator to start my project and in specific npx, a npm package runner, a tool to execute node.js packages.
npx create-react-app google-bookshelf
*I have change the name of the app after that.
My JS files, components and containers
index.js file will have my store with Redux that is connected with the rootReducer and thunk, in order to use async actions. index.js renders <Provider /> as the top level component and wrap my <App /> component.
App.js renders <NavBar />, <Footer /> and it is responsible for the React routes too using react-router-dom. I use react-router-dom, that is react-router plus some link improvements, <BrowserRouter> and <NavLink>.
<SearchableBookListContainer /> renders a form and takes care of its ‘query’ state. After the query, it renders a link list of books. This container is connected to the store to dispatch the action of searching and adding an item to the wishlist plus a list created after our search, the searchBookList. The list rendered with the results of the search has nested links to the book itself. Inside Link I pass a pathname and a state with the book object and in my representational Book component I will get this info as props from Link react-router. I can access them as props.location.state.
<WishListContainer /> is connected to the store and gets the wishlist from here and renders it. It dispatch two actions, getMyWishList that fetches my API end point for a list of books and the deleteBook action. The list of books rendered follows same pattern as the one displayed in <SearchableBookListContainer />, and includes links to the book itself.<CreateBook /> is a container connected to the store to dispatch the action of adding a new book and renders a form to create it.
<Book />, <Home />, <Footer /> and <NotFound /> components are representational components.<NavBar /> takes care of all links importing from react-router-dom NavLink.My source for the data is Google Books API. The Google Books API allows a maximum of 40 returned results and can sort only by search relevance and publish dates. I used the first functionality.
Using Redux and Thunk
Redux is a predictable state container for JavaScript applications. It helps you write applications that behave consistently, run in different environments (client, server, and native), and are easy to test. — https://redux.js.org/
I will use Redux to organize and have all my states in the same place and Thunk as a middleware to help me alter the behaviour of my actions, allowing me asynchronous requests. I will need to dispatch an action saying I am loading data, then to make a request to the API, and then to wait for the response and then dispatch another action with the response data.
With a plain basic Redux store, you can only do simple synchronous updates by dispatching an action. Middleware extend the store’s abilities, and let you write async logic that interacts with the store. — https://redux.js.org/
To install Redux and Thunk in my app I type into my console:
npm install --save redux
npm install --save react-redux
npm install --save redux-thunk
- Initialize my store in
index.jsusing createStore Redux function and pass it down to my top-level<App />container.
|
1 2 3 4 5 6 7 8 9 10 11 12 13 14 15 16 17 18 19 20 21 22 |
import React from 'react'; import ReactDOM from 'react-dom'; import App from './containers/App'; import * as serviceWorker from './serviceWorker'; import { createStore } from 'redux'; import { Provider } from 'react-redux'; import booksReducer from './reducers/booksReducer'; const store = createStore(booksReducer); ReactDOM.render( //We pass our store as a prop to Provider and wrap our App component so it will have access to our Redux store and/or dispatch actions from any component we want. <Provider store={store}> <App /> </Provider>, document.getElementById('root') ); // If you want your app to work offline and load faster, you can change // unregister() to register() below. Note this comes with some pitfalls. // Learn more about service workers: https://bit.ly/CRA-PWA serviceWorker.unregister(); |
To have access to the store in any of our components we import the react-redux function connectinto the component where we want to have access.
If we want some state we can use:
|
1 2 3 4 5 |
const mapStateToProps = state => { return { whatEverWeWant: state.whatEverWeWant }; }; |
We can access these data as: this.props.whatEverWeWant.
If we want to dispatch an action and update our store we do something like:
|
1 2 3 4 5 |
const mapDispatchToProps = dispatch => { return { typeOfOurAction: () => dispatch({ type: 'TYPE_OF_OUR_ACTION' }) }; }; |
|
1 2 3 4 |
export default connect( mapStateToProps, mapDispatchToProps )(App); |
Then to be able to debug I have installed redux-devtools-extension and add this code to my index.js:
|
1 2 3 4 5 6 7 8 9 10 11 12 13 14 15 16 17 18 19 20 21 22 23 24 25 |
import React from 'react'; import ReactDOM from 'react-dom'; import App from './containers/App'; import * as serviceWorker from './serviceWorker'; import { createStore } from 'redux'; import { Provider } from 'react-redux'; import booksReducer from './reducers/booksReducer'; const store = createStore( booksReducer, window.__REDUX_DEVTOOLS_EXTENSION__ && window.__REDUX_DEVTOOLS_EXTENSION__() ); ReactDOM.render( //We pass our store as a prop to Provider and wrapp our App component so it will have access to our Redux store and/or dispatch actions from any component we want. <Provider store={store}> <App /> </Provider>, document.getElementById('root') ); // If you want your app to work offline and load faster, you can change // unregister() to register() below. Note this comes with some pitfalls. // Learn more about service workers: https://bit.ly/CRA-PWA serviceWorker.unregister(); |
Considering web accessibility in my app
I have followed some requirements to take into account web accessibility.
- WAI-ARIA ( Web Accessibility Initiative – Accessible Rich Internet Applications). I am using Aria HTML attributes.
- Using as possible fragments <> </>to group together multiple elements and don’t break the HTML semantic.
- Every HTML form control, such as
<input>and<textarea>is labeled accessibly. - Create react app has the
eslint-plugin-jsx-a11yplugin with a subset of rules activated that checks your code as you develop.
Using docker
I wrapped up the project as a docker image in the Dockerfile.

Creating my API
I follow these instructions and as soon as I have the basics working I do the following:
Create a model for my Book:
|
1 |
rails generate model Book title:string author:text info:text |
I create a seeds file and run my migration:
|
1 2 3 |
rails db:migrate rails db:seed |
Generate my controller:
|
1 |
rails generate controller Book |
Create a serializer for book and draw my endpoint inside config/routes.rb
|
1 2 3 4 |
Rails.application.routes.draw do # For details on the DSL available within this file, see https://guides.rubyonrails.org/routing.html resources :books end |
How do I connect my react app with my rails API? In my actions. I fetch the end point of my API “books” and GET and POST to it.
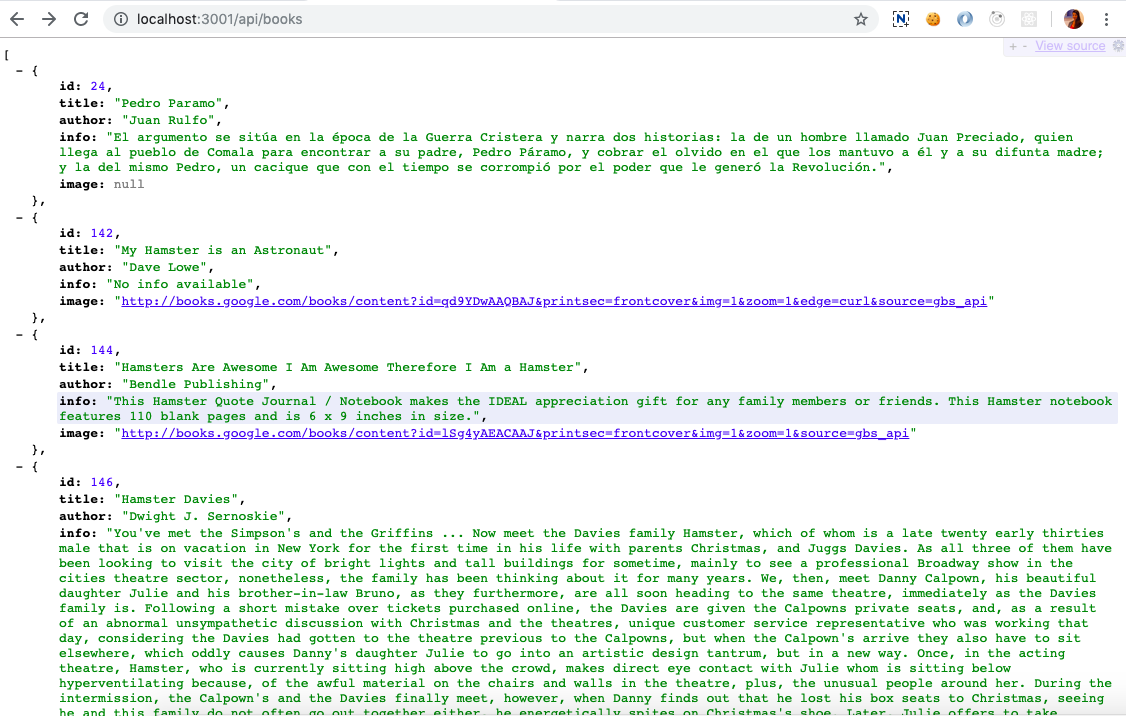
This is how my end point looks with my wishlist:
 And I think that that’s it! I have enjoyed a lot this project despite it took my a while to figure out Redux functionality. I went through a lot of different problems and learnt a lot. Ah, this bug was my favourite one . I manage to set
 undefined as my query so my search results were hilarious but very revealing too!